Skip to content

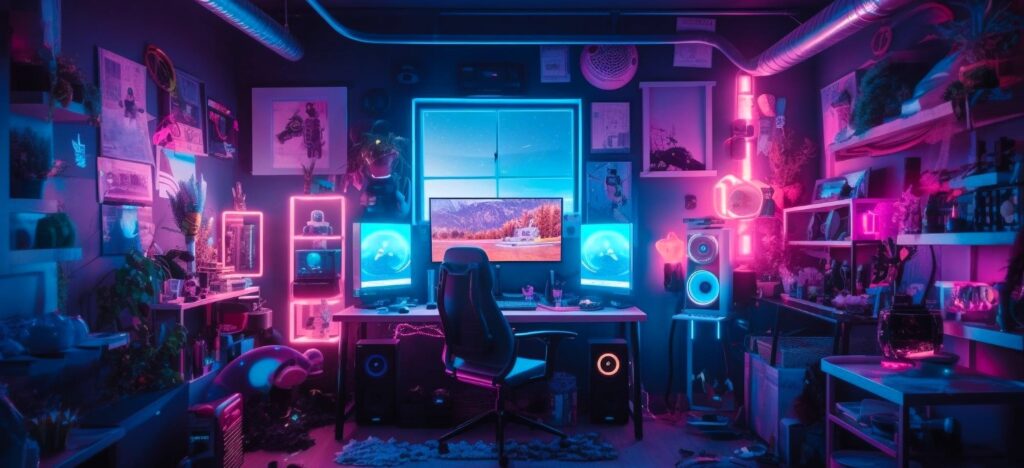
Transform your home into a pro streaming studio without breaking the bank! Living Gizmo’s guide reveals 5 essential tech hacks for Budget-Friendly Streaming.
Ever watched a Twitch streamer or YouTuber and thought, “Wow, their setup is amazing! I could never afford that…”? Well, here’s the good news: You’re wrong!
At Living Gizmo, we’re all about demystifying tech and proving that you don’t need a Hollywood budget to achieve professional results. We’re passionate about finding the best gear that won’t break the bank, because we believe everyone deserves the chance to shine online.
That’s why we’ve put together this ultimate guide to budget-friendly streaming. We’ll walk you through five essential tech hacks that will transform your humble abode into a pro-level home studio, without emptying your wallet. Get ready to level up your stream and wow your viewers, all while keeping your finances intact. Let’s dive in!
Hack #1: Light Up Your Stream (Without Emptying Your Wallet)
Believe it or not, lighting is one of the biggest factors that can make or break your stream. Great lighting not only makes you look more professional, but it also creates a more visually appealing experience for your viewers. Let’s face it, nobody wants to watch a stream where they can barely see the host!
Why Lighting Matters (More Than You Think)
Think of lighting as your on-screen makeup. It can smooth out your complexion, highlight your features, and create a polished look. Good lighting can also set the mood and tone for your stream, making it feel more inviting and engaging. Plus, clear, well-lit visuals are simply easier on the eyes for your viewers, which means they’re more likely to stick around.
Banishing the Shadows: Common Lighting Mistakes (and How to Fix Them)
The most common lighting mistake is relying solely on overhead lighting, which can create harsh shadows and make you look washed out. Another issue is uneven lighting, where one side of your face is brighter than the other.
Here are a few simple fixes:
- Position yourself facing a window: Natural light is your best friend! If possible, set up your stream facing a window to get soft, flattering light.
- Diffuse harsh lighting: If you have to use overhead lighting, try diffusing it with a lampshade or a sheet of white fabric to soften the light.
- Add additional light sources: This could be as simple as turning on a desk lamp or using a ring light. The goal is to create balanced lighting from multiple angles.
Illuminating Options (on a Budget)
You don’t have to spend a fortune on fancy lighting equipment to achieve a professional look. Here are a few budget-friendly options:
DIY Hacks:
- DIY Softbox: Cover a cardboard box with white fabric and place a lamp inside to create a diffused light source.
- DIY Reflector: Use a white foam board or even a piece of white paper to bounce light back onto your face and fill in shadows.
- Window Hack: If your window light is too harsh, hang a white sheet or curtain to soften it.
Affordable Gear Recommendations:
- Ring Light: A ring light is a great all-in-one solution that provides even, flattering light. Look for one with adjustable brightness and color temperature.
- Desk Lamp: A simple desk lamp with an adjustable neck can be a surprisingly versatile lighting tool. Choose one with a daylight bulb for a natural look.
- Clip-on LED Panel: These small, affordable lights can be clipped onto your desk or monitor to add extra fill light.
Remember, the key is to experiment and find what works best for you and your space. With a little creativity and a few budget-friendly solutions, you can achieve stunning lighting that will make your stream look like a million bucks (without actually spending it!).
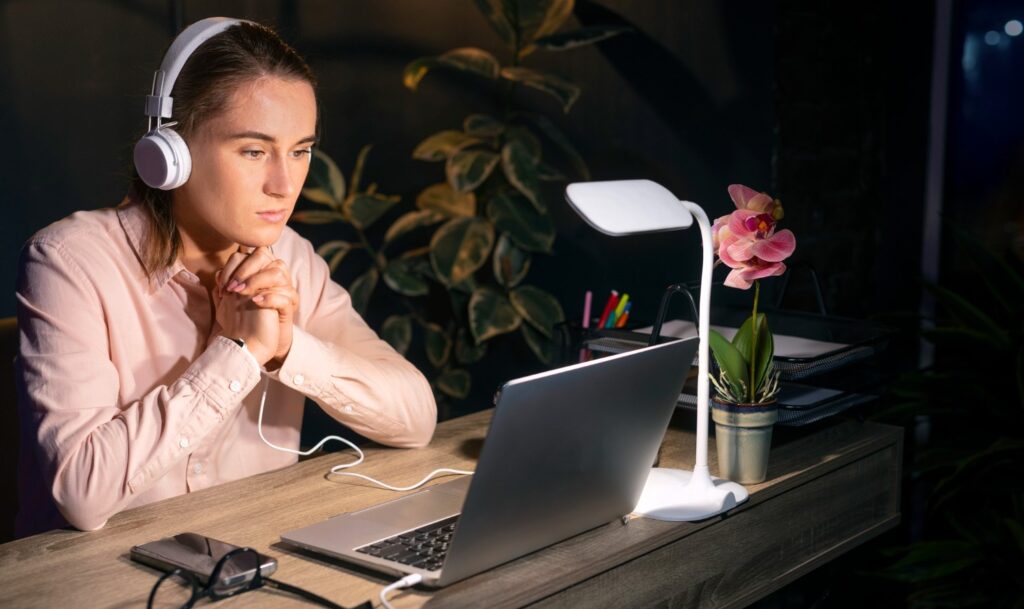
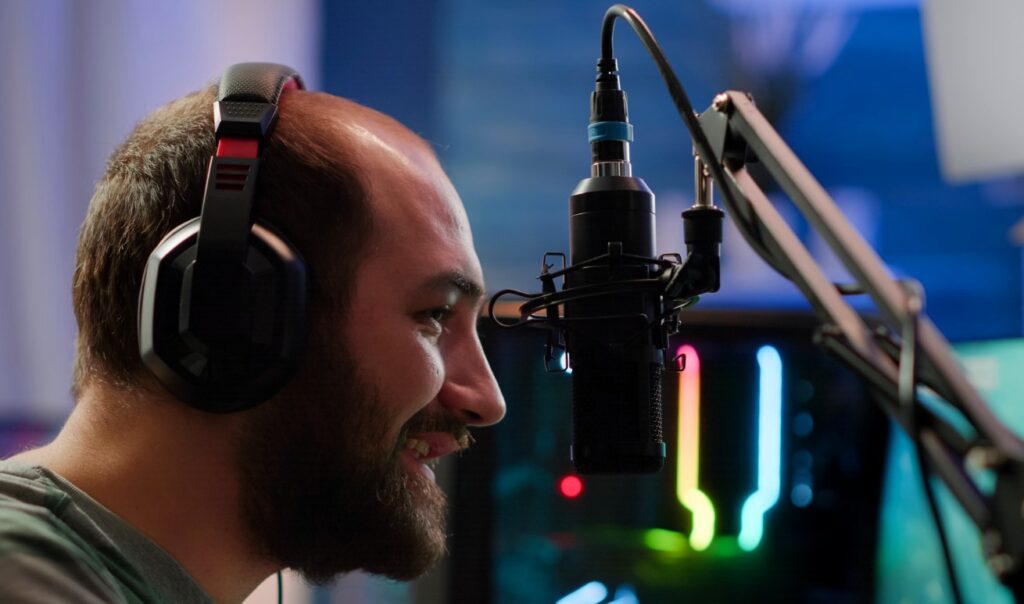
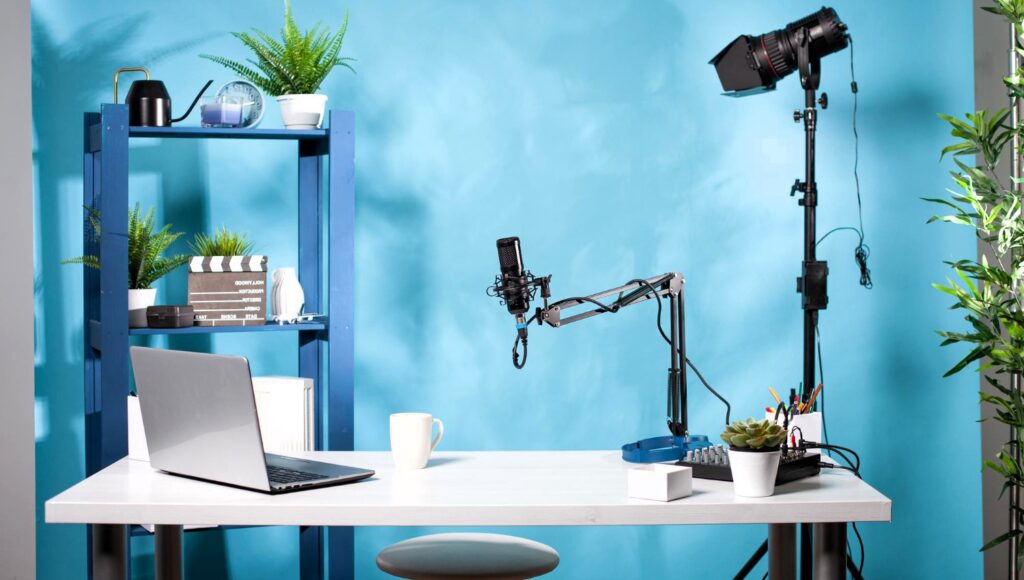
Hack #2: Crystal Clear Audio (For Under $100)
The Power of Sound:
Think of your audio as the handshake that welcomes viewers to your stream. If it’s fuzzy, distorted, or filled with background noise, they’re less likely to stick around. Crisp, clear audio isn’t just a luxury—it’s essential for keeping your audience engaged and coming back for more.
Microphone Magic (Without the Markup):
You don’t need to break the bank for great sound. Here’s a quick breakdown to help you choose the right mic:
- USB Microphones:
- Pros: Plug-and-play simplicity, ideal for beginners, often include built-in headphone jacks for monitoring.
- Cons: Generally not as high quality as XLR mics, less flexible for advanced setups.
- XLR Microphones:
- Pros: Superior sound quality potential, more adaptable for future upgrades (audio interfaces, mixers), used in professional studios.
- Cons: Requires an audio interface (additional cost), steeper learning curve for setup.
Top Picks for Budget Streamers:
- USB:
- Blue Yeti Nano: Compact, versatile, great for voice and instruments.
- Razer Seiren Mini: Sleek design, focused on vocal clarity, excellent for streaming.
- HyperX SoloCast: Simple, affordable, tap-to-mute function, clear sound for the price.
- XLR:
- Audio-Technica AT2020: Industry standard, neutral sound, durable, excellent for vocals. (You’ll need an audio interface like the Focusrite Scarlett Solo.)
- Rode NT-USB Mini: Hybrid mic (works with USB or XLR), high-quality sound, flexibility for the future.
Bonus Tip: Clean Up Your Sound
Even the best mic can pick up unwanted noise. Consider using free or low-cost noise reduction software:
- Nvidia RTX Voice: (Free) Powerful noise cancellation if you have an Nvidia RTX graphics card.
- OBS Noise Suppression Filter: (Free) Built into OBS Studio, simple to use, surprisingly effective.
- Krisp: (Freemium) Advanced noise cancellation for both your mic and incoming audio (e.g., Discord calls).
Remember: Position your mic correctly (about 6-8 inches away) and try to minimize background noise in your recording environment.
Hack #3: Camera Upgrades (That Won’t Break the Bank)
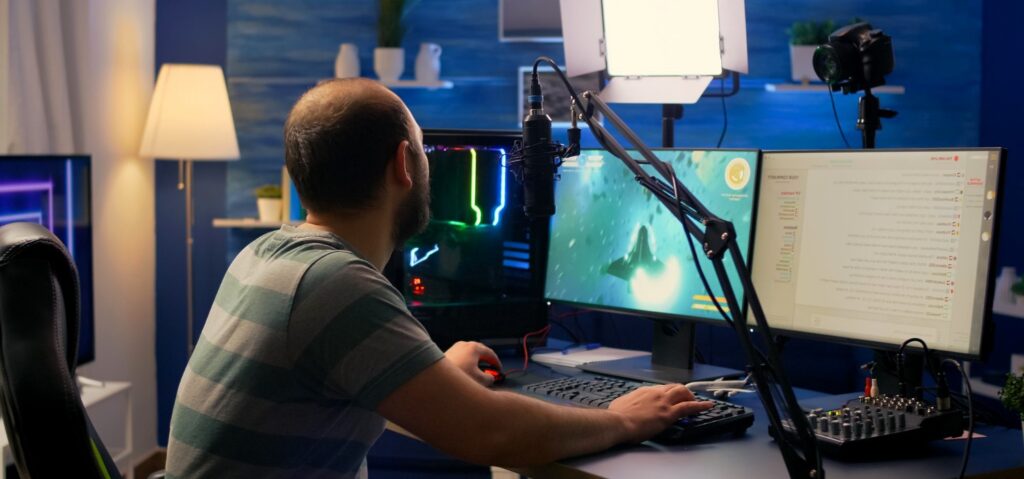
The Webcam Conundrum:
Most laptops come with built-in webcams, and while convenient, they’re often the weakest link in your stream setup. Low resolution, poor color accuracy, and grainy footage can leave your viewers unimpressed. The good news is, you don’t need a Hollywood budget for a serious upgrade.
Unlocking Your Smartphone’s Potential:
Did you know your smartphone likely has a camera that’s better than most dedicated webcams? Several apps let you turn your phone into a high-quality streaming camera:
- EpocCam: Easy to set up, works wirelessly or via USB, offers decent quality.
- DroidCam: More features than EpocCam, including manual focus and exposure controls.
- Reincubate Camo: Great image quality and control, but requires a wired USB connection.
DSLR/Mirrorless Magic (on a Budget):
If you have a DSLR or mirrorless camera collecting dust, it can be a fantastic streaming tool! You’ll need a capture card to connect it to your computer. Here are a couple of affordable options:
- Elgato Cam Link 4K: Simple to use, plug-and-play, excellent image quality.
- AVerMedia Live Gamer Mini: Good value, lower latency, supports up to 1080p60.
Webcam Wonders:
If you’re looking for a dedicated webcam, here are a few options that provide excellent value:
- Razer Kiyo: Built-in ring light, great for low-light situations.
- Logitech C922 Pro Stream: Solid all-around performer, good low-light performance, background removal feature.
- Elgato Facecam: Premium image quality, great for well-lit rooms, advanced camera controls.
Additional Tips:
- Lighting is Key: Good lighting can dramatically improve your video quality, even with a basic camera.
- Background Matters: Keep your background clean and uncluttered for a professional look.
- Framing is Important: Position yourself in the center of the frame and ensure the camera is at eye level.
Hack #4: Backgrounds That Wow (Without a Hollywood Backlot)
Setting the Scene:
Your background is like the set design for your stream. A messy or distracting background can make you look unprofessional, while a well-designed one can elevate your content and create a more immersive experience for your viewers.
DIY Backdrop Delights:
- Green Screen on a Shoestring:
- You don’t need fancy equipment! A large piece of green fabric or even a green bedsheet can work wonders.
- Hang it tautly behind you to avoid wrinkles (use a clothes steamer for best results).
- Use free software like OBS Studio or XSplit VCam to replace the green screen with a virtual background.
- Themed Backgrounds:
- Get creative with fabric (think patterned sheets or curtains) to match your stream’s theme or your personality.
- Hang posters, artwork, or tapestries that reflect your interests.
- Use simple props like plants, shelves with books/collectibles, or even string lights to add depth and visual interest.
Software Solutions (Free & Fabulous):
- OBS Studio (VirtualCam): A powerful, free broadcasting software with a built-in virtual camera that lets you use virtual backgrounds with any streaming or video conferencing app.
- XSplit VCam: Another excellent free option with high-quality background replacement and blur effects.
- Snap Camera (for fun): If you want to add some fun and personality, Snap Camera offers tons of filters and lenses that can transform your background.
Pro Tips:
- Lighting: Good lighting is essential for a clean and professional look, especially with green screens.
- Distance: Make sure you’re positioned far enough from the background to avoid casting shadows.
- Experiment: Don’t be afraid to try different backdrops and software to find what works best for your style and content.
Hack #5: Wi-Fi Wizardry (for a Smooth Streaming Experience)

The Bandwidth Battle:
Think of your internet connection as the highway for your stream data. A slow or unstable connection is like a traffic jam, causing your stream to buffer, freeze, or drop in quality. High-speed, reliable internet is your ticket to a smooth, professional-looking broadcast.
Optimizing Your Connection:
- Wi-Fi Tips:
- Location, Location, Location: Place your router in a central, elevated position, away from walls and obstacles.
- Channel Surfing: Use a Wi-Fi analyzer app to find the least crowded channel for your router.
- Update Firmware: Ensure your router’s firmware is up-to-date for optimal performance.
- Quality of Service (QoS): If your router supports it, enable QoS to prioritize streaming traffic over other internet activities.
- Extenders/Mesh Systems: Consider using Wi-Fi extenders or a mesh system to improve coverage in larger homes.
- Ethernet Advantage:
- A wired Ethernet connection is almost always more stable and reliable than Wi-Fi.
- If possible, connect your streaming PC directly to your router with an Ethernet cable.
- This can significantly reduce latency (delay) and improve overall stream quality.
Troubleshooting:
- Restart: The classic IT solution! Restarting your router and modem can often resolve temporary connectivity issues.
- Check for Interference: Microwaves, cordless phones, and other electronic devices can interfere with Wi-Fi signals. Keep your router away from them.
- Test Your Speed: Use online speed tests (like Ookla Speedtest) to monitor your connection and identify potential problems.
- Contact Your ISP: If you’re experiencing persistent issues, contact your internet service provider for assistance.
Bonus Hack: Stream Deck Superpowers (On a Budget)
Control Center Command:
A stream deck is like a personalized control panel for your live stream. It allows you to trigger scenes, play sounds, control your camera, and even post to social media with the press of a button. While the official Elgato Stream Deck can be pricey, there are plenty of affordable alternatives to supercharge your stream.
DIY Stream Deck Alternatives:
- Keyboard Shortcuts:
- Most streaming software (OBS, Streamlabs, etc.) allows you to assign keyboard shortcuts for common actions.
- Create a cheat sheet with your most-used commands and keep it handy.
- Free Software:
- Touch Portal: Turn your smartphone or tablet into a customizable touchscreen control panel.
- Stream Deck UI: A free and open-source software that emulates the Stream Deck interface. You can use it with any device that has buttons (e.g., old keyboard, MIDI controller).
- Mobile Apps:
- Remote for OBS Studio: Control OBS from your phone or tablet.
- Streamlabs Mobile App: Manage your Streamlabs stream from anywhere.
Budget-Friendly Stream Deck Options:
- Elgato Stream Deck Mini: A compact version of the original with 6 customizable buttons.
- Loupedeck Live: A unique stream deck with touchscreens and physical dials for more advanced controls.
- Max Falcon Zero: A programmable keypad with mechanical keys that can be customized for streaming.
The Power of Customization:
No matter which option you choose, the key is to customize your stream deck to fit your workflow. Assign buttons to the actions you use most frequently, and create custom icons to make your deck visually appealing. With a little creativity, you can create a powerful command center that will help you run your stream like a pro!
Putting It All Together: Your Budget-Friendly Pro Home Studio
Recap & Celebration:
Congratulations! You’ve just leveled up your streaming game with these five essential hacks:
- Lighting Like a Pro: Your stream now glows with affordable lighting solutions.
- Crystal Clear Audio: Your viewers are hanging on your every word, thanks to crisp, clean sound.
- Camera Upgrades: You’ve traded grainy footage for a polished, professional look.
- Backgrounds That Wow: Your stream setting is now as engaging as your content.
- Wi-Fi Wizardry: You’re streaming smoothly, free from the dreaded buffering wheel.
With these upgrades, your stream is ready to shine! Remember, even small improvements can make a big difference.
Beyond the Basics:
But why stop there? Once you’ve mastered the essentials, consider diving into:
- Overlays and Graphics: Add custom overlays, logos, and alerts to personalize your stream.
- Interactive Elements: Engage your audience with polls, chatbots, and loyalty programs.
- Content Creation: Explore different formats, like Q&As, tutorials, or collaborations.
The possibilities are endless!
Living Gizmo’s Tech Expertise:
Have more questions about streaming or other tech topics? We’re here to help! Feel free to reach out through our contact page or leave a comment below. We’d love to hear from you and help you overcome any tech challenges you might be facing.
We’re excited to see what you create! Happy streaming!
Budget-Friendly Streaming FAQs: Your Questions Answered
1. What’s the absolute minimum budget I need to start streaming?
Technically, you can start streaming with just a smartphone and a decent internet connection. However, for a better quality stream, aim for a minimum budget of $100-$200. This will allow you to get a basic microphone, lighting, and possibly a webcam upgrade.
2. Can I use my built-in laptop webcam for streaming?
While you can use it, built-in webcams are often low resolution and don’t offer the best image quality. If you’re on a budget, consider using your smartphone as a webcam with apps like EpocCam or DroidCam. For a slight upgrade, you can find decent webcams for under $50.
3. What’s more important for streaming: a good microphone or a good camera?
Audio quality is arguably more important than video quality for most viewers. Invest in a decent microphone first to ensure your voice is clear and easy to understand. You can gradually upgrade your camera later.
4. Do I need a green screen for streaming?
A green screen isn’t necessary, but it can be a fun and creative way to change your background. You can create a DIY green screen with a green bedsheet or fabric. If you don’t want a green screen, use a clean and uncluttered real-life background or try virtual backgrounds in OBS or XSplit VCam.
5. How can I improve my lighting without spending a lot of money?
Natural lighting is a great (and free) option if you have a well-lit room. If not, you can create a simple lighting setup with desk lamps or clamp lights. Look for affordable LED bulbs with adjustable brightness and color temperature.
6. Can I use my smartphone as a microphone?
While you can use your smartphone’s built-in microphone, it’s not ideal for high-quality audio. Consider getting a dedicated USB microphone, even a budget-friendly one, for better sound.
7. What internet speed do I need for streaming?
For a decent 720p stream, aim for an upload speed of at least 3 Mbps. For 1080p, you’ll want at least 5 Mbps. A stable connection is more important than raw speed, so prioritize a reliable internet service provider (ISP).
8. What’s the difference between USB and XLR microphones?
USB microphones are easier to set up (plug-and-play) and are often more affordable. XLR microphones offer better sound quality and more flexibility for advanced setups, but they require an audio interface.
9. What are some budget-friendly streaming software options?
OBS Studio and Streamlabs OBS are both free and offer powerful features for streaming and recording. If you’re looking for virtual camera functionality, XSplit VCam has a free version with basic background replacement.
10. What’s the best way to make my stream look more professional?
Focus on clear audio, good lighting, and a clean background. You can also add overlays, alerts, and branding elements to personalize your stream.
11. Do I need a capture card for streaming?
You only need a capture card if you want to use a DSLR or mirrorless camera for streaming. If you’re using a webcam or your smartphone, you don’t need one.
12. What are some good budget-friendly capture cards?
Elgato Cam Link 4K and AVerMedia Live Gamer Mini are both solid options for under $150.
13. Can I stream on multiple platforms at once?
Yes, you can use services like Restream or simulcasting features in some streaming software to broadcast your stream to multiple platforms (Twitch, YouTube, Facebook, etc.) simultaneously.
14. How do I get more viewers on my stream?
Consistency is key. Stream regularly, promote your channel on social media, engage with your audience, and create high-quality content that people will enjoy.
15. What are some other resources for learning more about budget-friendly streaming?
There are tons of tutorials and guides online. YouTube channels like EposVox and Gaming Careers offer great tips and advice.
Conclusion: You’re a Streamer Now!
Remember, you don’t need a Hollywood budget to create a professional-looking stream. With a little creativity and resourcefulness, you can build an impressive setup that rivals the pros. We’ve shown you the five essential hacks for budget-friendly streaming, and now it’s your turn to shine!
Join the Living Gizmo Community:
We’d love to see what you create! Share your budget-friendly streaming setups and successes in the comments below. We’re a community of tech enthusiasts who are always eager to learn and grow together.
Looking for More Tips and Tricks?
For more in-depth reviews and guides, check out these articles on our blog:
- Dominate On A Budget: Top 5 Best Budget Gaming Peripherals In 2024
- 5 Mind-Blowing Ways Haptic Suits Will Change Your Gaming Experience Forever
We’re constantly updating our content with the latest tech trends and advice, so be sure to subscribe for updates and stay connected!